Affichage des articles dont le libellé est In the Palm of the White Hand. Afficher tous les articles

mardi 7 mai 2024

Chapter IX : The Winged Horror - The Adventure

The scenario is here.

The heroes arrive on the scene just as the invocation begins.  The stakes are extremely high; if the east begins to crumble, the North will fall...


 The powerful winged demon rises !


The heroes quickly targetted the two remaining emirs, and slew them both in rapid succession.  This caused five wounds to the demon, rendering it vulnerable.  Accompanied by Turanian loyalists, Brude went looking for anything that would help them.

He had to face up to none other than the Hyperborean Witchman....and slew her with a mighty blow ! From her fallen body, he picked up a sword thrumming with magical energy [actually, a Halberd came out of the chest he explored, but this seems a better narrative !]


The Winged Demon bent his will on Zoraya and drew her towards him, dealing a powerful but not deadly blow.  As the winds rent the air about him, hellbats bit at the heroes.

Kerim played an important role, his arrows causing enough damage to avoid the demon from regenerating.

Zoraya beat a fighting retreat, and then Brude, having lain low the Witchman, dashed towards the demon.


The thief become hero dealt a fatal blow to the monster, dispatching it back into the darkness from which it had been drawn.  The North was saved !


A great finale to the campaign.  The scenario initially lulled the heroes into a sense of easy victory, until the demon became more active and showed what deadly stuff it was made of.

The campaign progression influenced the scenario in a balanced way, reflecting well the successes and failures of the heroes.


Everyone gains +6 XP, thanks to surviving and to this mighty victory.  Brude was the hero of the day, bringing down both the Witchman and the Demon itself, for an additional +2 XP.

I presume that everybody has sufficient time to rest and heal before continuing their journey, and that at the end of that, the heroes acquire their usual equipment.


samedi 25 février 2023

Chapter VIII : The Offering - The Adventure

The scenario is here.

The initial plan was for Zoraya and the three Turanian guardsmen to make for the larger building, hopefully picking up some loot on the way. Brude was to pick the lock on the gate, and head towards the small temple.  Chimène was meant to fight it out in the middle.


That plan went rapidly pear-shaped, as Chimène was overwhelmed by incoming fire, the mercenary archers bounding forwards to seek her out behind the cover of the central wall.  Zoraya was forced to come back to help her, also sending in the loyal Turanians to help.  Whilst Brude continued his explorations, the two women gradually overcame all resistance.

One of the Emirs fled with his father, but Zoraya was closing in on the two remaining Turanian lords.  The Turanian spearmen fighting for the Emirs were brutally sacrificed to bring forth a Dynwocor and slow her down.  The beast charged into the fray, but the agile Turanian diploat was no easy target, and sustained only a flesh wound.


One of the Turanian soldiers hurried to assist her, whilst the diplomat headed for the Emirs.  She was joined by Brude a few seconds later, who cut one of them down.


The Hyperborean Emissary decided to use her ability to raise the dead - which actually had little impact - and reveal herself, mainly because the loyalist Turanians were almost upon her, and also because the Dynwocor was close to hand.  Chimène saw red, and leapt over the ruined mud-brick wall to engage her mortal foe.  The presence of the Dynwocor [restricting saturation to 2, ndlr] prevented her, however, from putting her all into the fight and she caused no hurt.


The Emissary managed to get over the wall, and join the Dynwocor.  The combination of Horror and Jinx seemed to be unbeatable, but ferocious attacks from both Brude and Zoraya severely wounded the Hyperborean [down to only 2 wounds, ndlr].

Time was however running out, leading the heroes to take desperate risks.  The Emissary's Pestilential Swarm caused a lot of damage, and the remaining Emir proved to be a deadly foe.  Brude was saved - twice ! - only by the chainmail armour he had found near the main gate of the fortress but even so had only one wound remaining.

The last attack by the Emir proved too much for him, and Brude went down.  Covered by the Dynwocor's rage and the heros' exhaustion, the Emissary was able to escape the fortress.

An exciting game, with a lot of hard choices to make, especially I found for the Overlord.  Choosing when to Let the Dead Rise, when to reveal the Emissary, and when to bring on the Dynwocor is not easy, especially as they all lengthen the River.  Having the Emirs flee costs a lot of time and also deprives the Overlord of a dangerous fighter, so no easy choice there either.  On the heros' side, the mistake was to leave Chimène too exposed, when a loyalist Turanian would have given the necessary protection, as he did thereafter.

A victory for the forces of evil, perhaps a critical one !

Zoraya and Chimene gain +1 XP, since one of the Emirs was slain. Zoraya ended the battle with an additional wound, bringing her up to 2.

Brude exchanged his shield for a chainmail shirt.  He was badly hurt, with 3 wounds.

One of their Turanian companions was killed during the fighting, leaving two for the final encounter...

Chapter IX : The Winged Horror

Number of heroes : 3
Difficulty : 2

The Winged Horror

The trail leads to a cursed place, close to the borderlands shared by Turan and Hyperborea.  None, except perhaps the Witchman, know what happened in this forsaken place so long ago, but it breathes evil. The surviving brothers are arrayed in an arc before an unholy altar; their father, their victim, lays upon it, already lifeless, sealing their pact with Hyperborea.  Many of the Turanian soldiers present are in a trance, as if they had sought to rebel against the horrors they were witnessing.  The Witchman is dancing before the altar, an alien dance of jerking movements and strange sounds, and before the adventurers' eyes, shadows coalesce into a horrific winged form, a winged demon of the abyss whose shifting form hurts eyes and mind.  Should he fully coalesce, the Witchman will unleash him on an unsuspecting world, beginning a reign of terror.  It will end only when one of the Emirs sits on a new throne carved out of northern Turan, as a puppet of Hyperborea, and a dangerous step closer to the Sultan's title.

Although they are too late to save the victim, the heroes might just be able to save Turan, and the wider world, from what the Hyperboreans are plotting...


Objectives
-  The Heros win if they slay the Demon before the end of the tenth turn.
-  The Overlord wins otherwise.

Game length
The scenario lasts 10 turns.  The Heroes play first.

Scenario Map
The playing surface is 7 x 7 hexes, gridded A to G (columns) and 1 to 7 (rows).  It portrays a place of forboding evil in the barren, cold, stony desert wastes of northern Turan.


Heroes
In the campaign setting, the following heroes take part in the adventure, with any equipment they had or have acquired, and spells selected using the campaign game method.  They also have the assistance of any Turanian soldiers converted to the cause during the previous scenario (2 in the current campaign).  Furthermore they have received unexpected, but most welcome, assistance from a member of the Watch named Kerim.


Brude (set up in G1)

Chimène (set up in G1)

Zoraya (set up in G1)

Turanian Infantry (set up in G1).  These allies can be commanded by any hero.  Galvanised by the dangers to their homeland, they have a permanent red gem (see House Rules).

Kerim (set up in G1).  [use the Kerim Shah tile, with 6 PV].  This ally can be commanded by any hero, and given his skill and experience, also has a permanent red gem (see House Rules).


All Heroes begin with 2 Energy Gems in the Fatigue Zone.  If any heroes are bearing wounds from previous adventures, the effects of this is now taken into account.  However, powerful healing herbs provided by the Watchman, allow two characters to heal up to 2 wounds each, but only before the scenario begins.


The Overlord
The Overlord's forces are as follows :

Hyperborean Witchman (set up in C6), with Hand of Death, Return of the Brave and Ymir's Rage

Winged Demon [use Thaug tile] (set up in C5), with Tears of Dagon, Dagon's Attack and Mind Control


2 Grey Hellbat Swarms [use Tentacles tile] (set up in C5, C5)

3 Blue Hypnotised Turanian Soldiers [use Pict Hunter tile] (set up in B5, D3, D6)

4 Green Hypnotised Turanian Soldiers [use Pict Hunter tile] (set up in B3, B7, D3, E4)

4 Grey Turanian Scouts (set up in B1, A6, E5, G5)

4 Purple Mercenaries (set up in A7, B3, C7, F3)


The Overlord begins with 13 Energy Gems in the Available Energy Zone, and 4 in the Fatigue Zone.  He or she recovers 5 each turn.


Ravens
When an Event is played, the Overlord can choose one of the following : 


Reinforcements : 5 Reinforcement Points

Sacrifice : The Overlord chooses all the figures from a same tile, and removes them entirely from the game.  For each removed figure that was within 2 hexes of the Winged Demon, he places a Hellbat Swarm in the Demon's hex.  The Hellbat Swarm have the same colour and position as the sacrificed tile.  This Event can only be played once.


The River

1 : Blue Hypnotised Turanians
2 : Green Hypnotised Turanians
3 : Grey Turanian Scouts
4 : Purple Mercenaries
5 : Hyperborean Witchman (6 wounds)
6 : Grey Hellbat Swarms
7 : Winged Demon (8 wounds)
8 : Raven


Reinforcement Zones
There are four reinforcement zones (A3, A7, B3, C7)


Equipment Cards
There are six Treasure Chests (A3, A7, B3, C7, F3, G7), but they are simple baskets needing a Simple Manipulation to open.  The Equipment Deck is made up of Scale Armour, Halbard, Bossonian Bow, Javelin, Explosive Orb and Life Potion.


Terrain

If the game is played on 3D terrain, the House Rules for this apply.

All doors are unlocked.

Doors are vulnerable to the Wall Breaker skill, exterior and interior walls are not.

Except where a door or a pile of rubble is present, the fort's walls are considered to be higher than anything likely to be represented on the board.  They are 12cm high and vertical.

Heros and Allies may not leave the board.


Other House Rules

If players are in agreement, any or all of the other House Rules may apply


SSRs

-  The Coming of the Darkness

The Winged Demon begins the scenario with 8 wounds.  At the beginning of each turn, including the first, he gains 1 wound.


-  The Swirling Vortex

Given the size of the Demon, but also of the vortex which swirls around him, the Demon and any Hellbat Swarm in the same hex may be attacked from any adjacent hex, as long as there is line of sight.


-  I do have some clue what is going on

Each clue to the ritual recovered during the Abandoned Village adventure [5 in the current campaign] reduces the Winged Demons passive defense by 1


-  Feed the beast

If the Hyperborean Emissary was killed during The Offering scenario, the Winged Demon loses 1 attack die.  If the Emisary was captured, the Demon loses 2 dice.


-  The parricides must die !

Five objects are required for the ritual, and only the acolytes of the ritual - the Emirs - can manipulate them.  If some of the Emirs have been slain, the others will have to bear a greater burden, which also makes the ritual riskier.

Place the remaining Emirs in the following hexes, beginning with the first in the list : A3, D4, B3, C5, B4.  The player who controls the Heros now decides how the ritual objects are distributed among the Emirs, which must be done as evenly as possible [in the current campaign, only 2 Emirs have survived].

A Hero in a hex with an Emir, can break all the ritual objects he holds by a Complex Manipulation (3 successes), or an Attack that obtains five symbols (no defense possible).

Each ritual object that is shattered immediately causes a wound to the Winged Demon.


-  Did we save the North ?

If the Heroes win, thus having slain the Winged Demon, each of them, even those who have all of their Energy Gems in the Wound Zone at the end of the scenario, gain +5 XP.


dimanche 5 décembre 2021

Chapter VIII : The Offering

Number of heroes : 3
Difficulty : 2

The Offering


Thanks to the clues gathered in Arkamir - and especially the one passed down by the dying brother, in his final breath - the adventurers have a far clearer picture of their enemy's intentions.  They know the location of the abandoned fort where the Hyperboreans and the treacherous Turanians, and their victim, are meant to meet.  They also know that if they intend to save the Witchman's intended victim, this will not avert the ritual itself that the Witchman has already begun preparing.  The demon will still rise, and an appropriate substitute will be needed to appease it, lest it break its bonds and go on the rampage.  The Hyperborean Emissary is the perfect candidate to feed to the beast, but even taken by surprise, she will be no easy target...

Objectives
-  The Heros win a minor victory if they kill the Emissary before the end of turn 8.  They win a major victory if a Hero manages to carry the Emissary off-board within the same time frame, as this will help them greatly during the final showdown.
-  The Overlord triumphs if the Emissary is on-board and alive at the end of turn 8.

Game length
The scenario lasts 8 turns.  The Heroes play first

Scenario Map
The playing surface is 7 x 7 hexes, gridded A to G (columns) and 1 to 7 (rows).  It portrays a crumbling mud-brick fort and way-station, abandoned to the elements for over a decade.  The exterior walls are intact in places, and pierced with high wooden doors, but in other sectors they have been reduced to rubble.


Heroes
In the campaign setting, the following heroes take part in the adventure, with any equipment they had or have acquired, and spells selected using the campaign game method.  They also have the assistance of any Turanian soldiers converted to the cause during the previous scenario (3 in the current campaign).


Brude (set up in B1)

Chimène (set up in B1)

Zoraya (set up in A2)

Turanian Infantry (set up in A2).  These allies can be commanded by any hero.


All Heroes begin with 5 Energy Gems in the Fatigue Zone.  If any heroes are bearing wounds from previous adventures, the effects of this is now taken into account.


The Overlord
The Overlord's forces are as follows :

5 Grey Turanian Scouts (set up in B2, B4, C2, C3, D4)

4 Blue Turanian Infantry (set up in B4, C2, C5, E3)

4 Grey Mercenary Archers [use Kothian Archer tile] (set up in B5, C7, E2, G4)

1 Grey Emir [use Captain tile] (set up in E5)


The Overlord begins with 6 Energy Gems in the Available Energy Zone, and 6 in the Fatigue Zone.  He or she recovers 5 each turn.


Ravens
When an Event is played, the Overlord can choose one of the following : 


Reinforcements : 4 Reinforcement Points

The Construct : the Hyperborean Emissary sacrifices the lives of her men to bring a mighty Dynwocor out of its drug-induced torpor.  The Overlord chooses a tile, which is replaced by that of the Dynwocor (8 wounds).  All the figures belonging to that tile are removed from the board (but may be summoned as reinforcements).  The Dynwocor appears in the same zone as any one of the removed figures.  This event may only be played once, and does not require the Emissary to still be in the game.

Let the Dead Rise ! : Assisted by her master, the Witchman, the Hyperborean Emissary raises an army of the dead.  Each dead figure on the playing surface is replaced with a Mummy.  A Hero, an Emir, or the Dynwocor is replaced with an upgraded Grey Mummy, the others by an ordinary Grey Mummy.  The corresponding Mummy tiles are positioned at the end of the River.  This event may only be played once, and is not available if the Emissary is at 0 PV.


The River

1 : Grey Turanian Scouts
2 : Grey Mercenary Archers
3 : Blue Turanian Infantry
4 : Grey Captain (6 wounds)
5 : Raven
6 : Empty
7 : Empty
8 : Empty


Reinforcement Zones
There are two reinforcement zones (A2, D1)


Equipment Cards
There are seven Treasure Chests (D1, F2, D5, E4, A7, D7, G7), each needing a Complex Manipulation with 1 success to open.  The Equipment Deck is made up of Chainmail, Two-handed Sword, Zingaran Bow, Parrying Dagger, Explosive Orb, Life Potion and the spell Mitra's Healing.


The spell Mitra's Healing may be cast once by the Hero that finds it, be he or she a magic-user or not.  It may only be cast during the scenario, and is lost beyond it.


Terrain

If the game is played on 3D terrain, the House Rules for this apply.

All doors are locked, and require a Complex Manipulation with 2 successes to open.  Overlord figures can unlock a door for the cost of two movement points.   Once unlocked, a door is no longer a hindrance to movement.

Doors are vulnerable to the Wall Breaker skill, exterior and interior walls are not.

Except where a door or a pile of rubble is present, the fort's walls are considered to be higher than anything likely to be represented on the board.  They are 12cm high and vertical.

If rubble is present in a zone, it is considered to fill the entire zone, which thereby requires an additional 1 movement point to leave, but not to enter.

Heros and Allies may leave the board by any board edge zone.  This costs 1 movement point.  The Hero or Ally may not return.


Other House Rules

If players are in agreement, any or all of the other House Rules may apply


SSRs

-  Holed up

At the beginning of the scenario, the Overlord places markers numbered 1 to 8 on the tabletop, and then secretly writes down one of the numbers.  This represents the zone that the Emissary is holed up in.

The Emissary is uncovered and placed on the board if a Hero or Ally enters the designated zone; if the event "Let the Dead Rise !" is played; if the Overlord decides to activate the Emissary.

Her tile is placed at position 1 of the River.  The Emissary has 6 Wounds, and the spells Recall, Yajur's Awakening and Pestilential Swarm.


-  So much for diplomatic immunity

Every time the Heroes reduce the Emissary to 0 PV, they may choose to kill her.  This ensures them a minor victory, but will make things much harder in the final showdown.  Alternatively, the heroes may knock her out.  She is now an object of Encumbrance Level 6.  Her tile remains in the River and may not be dredged.  A Hero carrying the Emissary who receives at least three wounds in hand-to-hand combat, must drop the Emissary.  She immediately comes to, with 3 Wounds the first time, then 2 and 1 thereafter.

Should the Emissary have 0 PV at the end of the scenario, but still be on the board, she is considered to have been killed.


-  Here they lay

Any figures killed during the scenario are left laying, unless they are brought on as reinforcements, or until the "Let the Dead Rise !" event is played.


-  Two down, three to go

The Grey Captain tile represents the three remaining Emirs.  At the beginning of the scenario, place a "3" marker next to the figure.  The first time the Overlord activates the Grey Captain, he must choose, as the tiles only action, to have one of the Emirs escape, taking the demon's victim with him.  Reduce the score on the marker by 1. The next time the Overlord activates the tile, he may choose to have one of the Emirs escape.  If it reaches 0, remove the Captain from the tabletop.

Each time the Captain reaches 0 PV, this represents one of the Emirs being killed.  Reduce the score on the marker by 1 as above.

When the Captain attacks, roll an additional red die for each additional point on the marker beyond 1.

Losing the Emirs, or having them escape, does not affect victory conditions for the Overlord, but the less emirs escape, the greater the advantage the Heroes will have in the final scenario.  Should none of the emirs escape, the heroes have recovered the father they intended to sacrifice.  This does not end the adventure, as the ritual must still be stopped, but the Heroes will have a very significant advantage in the final confrontation.


-  Staunch allies

If an Ally is killed during the scenario, roll one yellow die for him at the end of the game.  If no hit is showing, the ally was only stunned, and will be available for the following adventure.


-  You shall pay for your crimes

Every Hero, except those who have all of their Energy Gems in the Wound Zone at the end of the scenario, gain +1 XP for each Emir killed


dimanche 14 novembre 2021

Chapter VII : The Abandoned Village - The Adventure

The scenario is here.

The estate was abandoned by the time the three adventurers arrived; a chilling death scream greeted them, as a huge and malevolent spider squeezed its way onto the roof.  Turanian cavalrymen galloped out to meet the intruders.

Brude and Chimène both managed, however, to reach to the fear and loyalty in the Turanians' hearts, and have them join the Sultan's side.  Whilst Zoraya looted a wagon and scattered baggage in the search for clues, protected by a new ally, Brude fended off a rain of javelins with his shield.

Chimène headed around the back, where her Turanian ally and her had to face the Giant Spider.


Brude and Zoraya fought a running battle against the Hyrkanian bandits, their javelins bringing down the Turanian soldier.  Zoraya decided to counter-attack, cutting a swathe through them and leaving four dead.


Meanwhile Brude pulled back to the gate, dragging the Turanian's inert body with him, and intending to rifle through some crates and go over the bodies of a handful of dead servants to find out more about the brothers' intentions.


Whilst Chimène sent her Turanian soldier to help at the gate, and slid under the hairy legs of her enemy, through the house door, Zoraya slipped through the fighting, to throw her spear into the swollen body of the Giant Spider.  It did considerable damage, but did not kill the beast.

Chimène reached the fourth brother just in time to hear his dying gasp, his last breath carrying precious information.  The company could have escaped, had not the Giant Spider then cast a sticky web over Zoraya. It was its last deed, as Chimène emerged vengeful from the building, and cut it down.


The time needed by Zoraya to cut herself free from the web, gave the Hyperborean Witchman the means to summon a Giant Snake and thrust it into action.  It slithered over to Chimène, wounding her although her lithe dodging saved her from much greater harm.


The last remaining Turanian was more watching this, with wide eyes, than fighting; Brude managed to convince him to change sides.  This changed the ebb and flow at the gate, allowing Brude to sprint over to help Chimène.  His blow hurt the snake, enough for it to let Chimène free from its coils.  The two of them slipped away in the chaos.

Zoraya cut down the two remaining Hyrkanians, and managed to get away !


Victory for the heroes, who leave the board at the end of their 6th turn.

Both Zoraya and Chimène bear a wound, coming out of the village.

Zoraya had to leave her spear in the carcass of the Giant Spider, as Chimène had no time to pull it out.  Brude, who had given her his shield during the fighting, now took it back in exchange for the Zingaran Breastplate he had found.

For having defeated the Overlord, and discovered all five clues, all three adventurers acquire +2 XP.  Chimène, for having slain the Giant Spider, gains an additional +1 XP. 

The group convinced three Turanian soldiers to change sides.  Although one of them was put of out action defending Brude, it turned out he was only stunned, and Zoraya managed to drag him away.

This was a straightforward scenario, but surprisingly tense.  The Overlord has quite a lot of control over the length of the River, and if he plays it well, can keep the Heroes under a lot of pressure, especially if he can get the Giant Snake on board.  The choice of quickly converting Turanian soldiers, despite it being more difficult, was a wise one, since their "Sacrifice" ability is a useful shield against the numerous shooting attacks.

vendredi 12 novembre 2021

Chapter VII : The Abandoned Village

Number of heroes : 3
Difficulty : 1

The Abandoned Village

This scenario is inspired by Le Village Abandonné, from the mini-campaign L'Abomination de la Rivière Noire by Nicolas Texier
 

After parting ways with Rudraige and then Gawayn, Chimène rides to northern Turan, to the town of Yaralet, to try to warn the future victim of the five brothers, and hence put an end to Hyperborean machinations.

In Yarelet, she hears of the exploits of a Turanian diplomat named Zoraya, who slew one of five brothers in the midst of a bear hunt.  Certain that is no coincidence, the Warrior Nun of Mitra seeks her out.

Her information, drawn from the scroll deciphered in the Aifreweia, gives Zoraya the key to the conspirators' intentions, whilst for Chimène, their intentions become obvious.  The demon of elder days that the Hyperborean Witchman will raise for them, is obviously intended to put one of the five - well, four now - brothers on a new throne carved out of northern Turan.  As a Hyperborean puppet, he will be a threat to all of the North.  The two women pledge to fight for their common cause; Brude stands with them, although Sathach thinks it wiser that she stays in Yaralet, to watch over the ship that will take Zoraya home.

In the meantime, the Hyperborean emissary who recovered the scroll from Rudraige's body, has been in contact with her Witchman master, through magical means.  With the plot uncovered, time is running out.  Although the ritual was intended to be held in Hyperborea, the Witchman decides, instead, to set out for Turan and carry it out there.  That a Witchman sets foot outside of his homeland, demonstrates the great importance of this event.

He meets with his Emissary at a cursed site in Turan, where she hands over the scroll.  She has already summoned the brothers, who she now marches eastwards to meet.   The four surviving brothers leave Yaralet just hours ahead of Zoraya, Chimène and Brude, making haste towards their father's estate of Arkamir.  Once there they overpower his guards, and take him prisoner.


It is at this moment, face to face with the consequences of his deadly pact, looking at his father abased by his own power-hungry kin, that one of the brothers decides to back out.  Unfortunately he acts too rashly and is quickly overpowered.  Whilst the last three emirs head west, their sibling is left under guard, to be dealt with later.

The Hyperborean Witchman, however, who is following all this through a scrying mirror, has no such clemency.  He summons creatures of the shadow to kill the traitor, knowing that they will also devour those around him.  It is at the very moment that a hideous giant spider is sinking its venom-soaked fangs into the unfortunate brother's neck, that the adventurers come in sight of Arkamir.


Objectives
-  The Heroes win if at least one of them leaves the village by the end of turn 7.  Carrying off as many clues as possible regarding the ritual to come will be of great help for the final showdown
-  For the Overlord, victory comes from stopping the Heroes from achieving their goal

Game length
The scenario lasts 7 turns.  The Heroes play first

Scenario Map
The playing surface is 6 x 6 hexes, gridded A to F (rows) and 1 to 6 (columns).  It portrays the heart of a Turanian nobleman's estate, with houses, orchards or vineyards, and perhaps a small shrine.


Heroes
In the campaign setting, the following heroes take part in the adventure, with any equipment they had or have acquired, and spells selected using the campaign game method.


Zoraya (set up in A1)

Brude (set up in A1)

Chimène (set up in A1)


All begin with 5 Energy Gems in the Fatigue Zone.  If any heroes are bearing wounds from previous adventures, the effect of this is now taken into account.


The Overlord
The Overlords forces are as follows :

5 Grey Turanian Cavalry (who use the Hyena tile) (set up in B2, B3, C2, C5, D4)

1 Giant Spider (set up in C3)

The Overlord begins with 5 Energy Gems in the Available Energy Zone and 5 in the Fatigue Zone.  He or she recovers 5 each turn.


Ravens
When an Event is played, the Overlord can choose between the following.  Each Event may be played only once : 


Reinforcements : 5 Reinforcement Points

The Crawler in the Shadows : the Overlord places a Giant Snake on the tabletop in hex A1, with 8 wounds, and places its tile at the end of the River.


The Hound of Hell : the Overlord places a Dire Wolf on the tabletop in hex D6, with 4 wounds, and places its tile in position "3" of the River.

Barbarian incursion : taking profit from the weakening of their enemy, Turanian Bandits swoop down on the village.  Place 8 of them in hex F3, four of one colour and four of another.  Place one of the tiles in position "1" of the River, and the other in position "4".  The Reinforcement event may bring Turanian Bandits back into play.


The River

1 : Grey Turanian Cavalry
2 : Giant Spider (6 wounds)
3 : Raven
4 : Empty
5 : Empty
6 : Empty
7 : Empty
8 : Empty


Reinforcement Zones
There is one reinforcement zone, in hex F1.


Equipment Cards
8 Treasure Chests are placed (in B4, C2, C3, C4, D2, D5, E3, E4).  The Equipment deck is made up of cards A to E, representing clues about the riual, with an encumbrance value of 0; a Zingaran Breastplate, a Hyrkanian Sword, and the spell Rage of Bori.

Opening a treasure chest is a Complex Manipulation requiring once success.

The "Treasure Chest" in C4 represents the brother.  Unless all the clues have already been uncovered, he communicates, with his dying breath, two clues drawn from the Equipment Deck.

The spell "Rage of Bori" may be cast only by the character that finds it, whether he or she is a magic user or not.  It may only be cast during the scenario, beyond it the spell is lost.


Terrain

If the game is played on 3D terrain, the House Rules for this apply.

The Giant Spider may freely climb over any terrain, with no movement penalties.  It may not, however, enter a building or a tent.

The Heroes may leave the board by any edge hex, but once they do, they may not return.

All doors are initially closed, and require 1 additional movement point to go through.  Once opened, this no longer applies.


Other House Rules

If players are in agreement, any or all of the other House Rules may apply


SSRs

-  Horsing about

A Turanian Cavalryman who moves into combat, gains two additional yellow combat dice for each full two hexes crossed, taking the shortest path to the target from his starting position.  If using 3D terrain, only hexes moved through in a straight line, without crossing any obstacle higher than 3cm, count.  A Turanian cavalryman cannot enter a house or a tent.


A Turanian Cavalryman may, when targetted by an attack, choose to dismount.  He permanently becomes Turanian Infantry.  If the first to do so, place a Turanian Infantry tile (of any colour) in any chosen space of the River.  If a subsequent cavalryman does so, it is as if he was a reinforcement.


-  We may be on the wrong side here...

As time goes by, it is increasingly obvious to the Turanian soldiers, that the summoned creatures will kill them too.  Asking for Zoraya's protection, as an emissary of the Turanian court, will seem like an increasingly wise idea...

A Hero in the same hex as a Turanian (cavalry or infantry) may try to persuade him to change sides.  This is a Complex Manipulation, requiring as many successes as half the current turn (rounded up).  The attempt suffers from hindrance as would any other complex manipulation.

If the attempt works, a Turanian cavalryman will automatically dismount (see SSR "Horsing about").  The Turanian becomes an ally, who can be commanded by any Hero.  Such an ally may leave the playig surface as a Hero would.  He is no longer available as a reinforcement for the Overlord.

If a Turanian ally is killed during the scenario, roll one yellow die for him at the end of the game.  If no hit is showing, the ally was only stunned, and may take part in the next scenario.

Indeed, these Turanian allies, if they survive, will stay with the Heroes through to the end of the campaign, so use them wisely !


-  So that is what it is all about...

The more clues the Heroes acquire, the better they will be able to understand how to stop the ritual.  Beyond that, however, all Heroes, except those who finished the scenario with all their energy gems in the Wound Zone, gain +1 XP if all five clues were found.

mardi 9 novembre 2021

Chapter VI : The Hunt - The Adventure

The scenario is here.

In the teeming streets of Yaralet, excitement is at its peak.  Despite its muzzle, the giant bear that will provide today's entertainment, is strong enough to force a mighty roar out of its throat.


The most valiant captains of Yaralet are out in the streets to prove their worth.  Their men have put down their weapons, and laid aside their shields and armour, ready to wrestle with the strangers as custom dictates.  That these two strangers are women, makes them believe it will be an easier affair.

From one house comes the sound of struggle, curious onlookers try to get a glimpse.  Inside, Sathach is trying to wrestle open a chest in which her weapons have been stored, for she has spotted armed men in the street.  Two of them have followed her in and are trying to stop her.  The Queen of Four is ultimately successful however, but finds only an explosive orb.


Meanwhile, Brude is attempting, from the rooftops, to spot the Emir that he saw conspiring the previous day.  He narrowly dodged a blow from one of the Emir's armed men, that he only escaped by climbing up the wall. At its top, he was taken by surprise by one of Yaralet's captains.  Although the man is unarmed, his well-aimed blow leaves the Nemedian reeling.

The Giant Bear is rampaging through town, knocking over food stalls, and making sheep and goats in their pens, bleat with terror.


Sathach has, in the meantime, found Zoraya's spear.  An explosive orb disperses the crowd for a few moments, and also knocks out one of the Emir's men, and lightly wounds a captain.

Brude had already pushed back his assaillant and got a clear look at his face.  In the now cleared streets, he got a good look at the second captain - the Emir !  The crowds gathered once again, drawing back in dismay as the Emir drew his sword.  Sathach tossed Zoraya her spear, and the Sultan's emissary simply ran the Emir through, with one swift stroke.


The two split up, Sathach heading across town to try to find her gear, which she managed despite interference from the third Yaralet captain; and Zoraya trying to get closer to the beast to wrestle it down.  Unaware for now of the blood spreading across the ground, the crowd still thronged in the streets [the Overlord now trying to clog up Zoraya and Brude, in the hope of the third captain, on the other side of town, being able to master the ever-weakening bear].


Despite a good fight, this proved impossible, however, and it was left to Sathach to slip through the crowds.  Never one to underestimate the importance of a good show, she leapt onto the giant bear's back, wrestled it to the ground and triumphantly rose with its leash in hand !  The Yarelet captain, who had hoped to do the same, was honourable enough to acclaim her.


Not yet having heard that the beast was down, one of the captains leapt off the roof - almost killing himself in the process - and punched Zoraya in the shoulder.  This sent her reeling into one of the Emir's men, still intent on her death, but the Turanian noblewoman parried the blow.

The thronging crowd was now carrying the sound of triumph, and taking a more than concerned interest in the activities of the armed guards, who decided that discretion was the better part of valour [the game had run its 8 turns].

Zoraya and Sathach - and Brude, from the shadows - had scored a considerable victory in the streets of Yaralet.  The Queen of Four - whose identity had begun to be known in the town - had proven her reputation in the bear hunt, whilst Zoraya's skilled spearwork only increased her reputation.  That she had acted in self-defense was not questioned, and it did not harm her that the slain Emir was little appreciated.  Obviously, it did not improve her standing with the remaining four brothers and conspirators....

Both Zoraya and Sathach escape the adventure without any serious injuries.  Brude, who only found his sword and shield late in the day, was quite badly beaten, but struck by more knuckles than cold steel.  The bruises will disappear in a couple of days.

Sathach lost her Turanian sword, which she had to drop in order to haul the bear away.  I decided however that it was returned to her, in awe, by the town-dweller that picked it up, given Sathach's new-found reputation.  Her parrying dagger, on the other hand, which she had thrown at one of her assailants, is forever lost.

For having slain the Emir, Zoraya gains +1 XP; for her exploits, Sathach gains +2 XP.  All three gain an additional +1XP for having defeated the Overlord.

This was a fantastic scenario.  Although a little complicated to play - it is important to remember that those guards that are not with the Emir can still throw a punch, and can only be struck bare-handed - the interaction of the various elements worked really well.  The Overlord chose his Emir wisely, but should have protected him with one of his Guards, since they have "Sacrifice".  That mistake cost him his life, although Zoraya's attack was particularly well-aimed.

jeudi 12 août 2021

Chapter VI : The Hunt

Number of heroes : 3
Difficulty : 2

The Hunt


This scenario is inspired by Un Chameau en Déroute, a King Pledge scenario by Laurent Leloup, to which I have added the assassins.


Rumours have reached Agraphur and its vizir, that northern Turanian nobles are plotting secession.  They would not dare do so, if they did not have a powerful ally, but who that may be remains, for the moment, unknown.

It is time for "hooded diplomacy", and to that end the Vizir missions one of his best spies to travel north over the Vilayets Sea, and set her ear to the ground. 


Zoraya is to be carried across the sea by the pirate captain known as the "Queen of Four", who will also use her connections to introduce Zoraya into noble circles in those far off and hostile lands.  Using a substantial part of the treasure the Vizir provides her with, the Turanian diplomat hires, as her agent for all things devious, a recommended Nemedian thief named Brude.

The journey over the Vilayets Sea is eventless, the Queen of Four's reputation preceding her.  The three voyagers disembark at Yaralet, a small city spread over several islands of a river detroit.  It thrives from the various trade routes that run through it, and the pirates it shelters in return for a small cut of their bounty.

Zoraya presents herself as the Vizir's envoy, on a mission of inspection to make sure that laws are being correctly applied, that government is free from corruption, and that the tax rolls are in order.  In Northern Turan, more conservative than the heartland, it is unusual for women to occupy important court positions, but the charming diplomat delights the local nobility with tales of her travels, and her hunting exploits.  
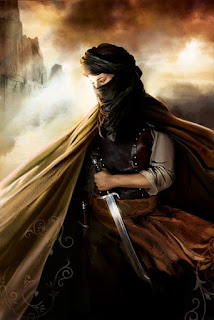

As a barely disguised test, it is agreed that she will participate in a local custom known simply as the "Bear Hunt" : a giant bear from the Northlands is muzzled, and released into the crowded streets of Yaralet, where young nobles compete to chase it down and wrestle it to the ground.  To the delight of all present, Zoraya tells them of a similar custom in southern Aquilonia.  Inspired by Zamoran traditions, it is a herd of bulls that is released, with streamers attached to manes and tails that the young men of the village must grab and present to their beloveds as tokens of their courage.  She paints such a vibrant picture of this custom that even the hardest bitten noblemen in the audience are transported thousands of miles to the heat and bustle of a foreign land and rejoice, a few moments, in a shared humanity.


Nonetheless, the presence of an emissary from Agraphur is a threat to some, and specifically to the five brothers who are at the heart of the plot against the Grand Sultan.  The following evening three of the brothers and some of their allies meet.  Zoraya already having earmarked them among the crowd, they are, little known to them, followed to this meeting by Brude, hiding in the shadows of the rooftops.  The conspirators decide to have Zoraya killed under cover of the chaos of the hunt.


Objectives

- The Overlord wins if at any point Zoraya has 8 or more energy gems in her wound zone, or if an Overlord-controlled character with multiple wounds exits the board with the Giant Bear in tow by the end of turn 8

-  If the Overlord does not meet this condition, the Heroes win if any Hero exited the board with the Giant Bear in tow before the end of turn 8
-  Any other result is a draw, unless the Emir has been killed in which case the Heroes win.


Game length
The scenario lasts 8 turns.  The Heroes play first.

Scenario Map
The playing area is 6 x 6 hexes, gridded A to F (columns) and 1 to 6 (rows).  It portrays the narrow streets of a Turanian town, overlooked by flat-roofed buildings and thronging with market crowds.


Heroes
In the campaign setting, the following heroes take part in the adventure, with any equipment they had or have acquired, and spells selected using the campaign game method :

Zoraya (set up in B6)
Sathach (set up in B6)
Brude (set up in B6)

If the hero's start hex includes a building, they may set up on its roof.

All begin with 7 energy gems in the Fatigue Zone, the Hunt being traditionally preceded by a night of festivities.  If any heroes are bearing wounds from previous adventures, the effect of this is now taken into account.

Each hero now places all her or his armour and weapons, as a block of cards which must remain together, into the Equipment Deck without shuffling them.


The Overlord
The Overlord's forces are as follows :

3 Grey Captains (set up in A3, C3 and F1).
2 Red Turanian Infantry (set up in C3 and D6; Passive Defense = 0).
2 Blue Turanian Infantry (set up in B3 and C4; Passive Defense = 0)
3 Orange Turanian Infantry (set up in B5, C6 and E3; Passive Defense = 0)
2 Green Turanian Infantry  (set up in B4 and C6; Passive Defense = 0)

The Overlord begins with 3 Energy Gems in the Available Energy Zone and 5 in the Fatigue Zone.  He recovers 4 each turn.


Ravens
When an Event is played, the Overlord can choose between :

 
General Enthusiasm : 3 Reinforcement Points

Crowd Control : the Overlord can place 2 additional Crowds (see SSR) in any hex with a street, although there cannot be more than 3 Crowds in play and no more than one per hex. After placement, any excess crowds are removed at the Overlord's choice.


The River

1 : Red Turanian Infantry
2 : Blue Turanian Infantry
3 : Grey Captain (each with 3 wounds : they have been drinking aswell...)
4 : Raven
5 : Orange Turanian Infantry
6 : Green Turanian Infantry
7 : Raven
8 : Empty

Hint : unless they are protected by their own men or crowds, the Overlord would do wisely to deploy his captains out of sight, for example inside a building, to avoid them being identified on the first turn (see SSR "I can see you !")


Reinforcement Zones
There are three reinforcement zones, in A4, A6 and F6.


Equipment Cards
Four Treasure Chests are placed in B1, F1, B3 and D4, inside a building if possible.  The Equipment Deck is made up of one Exploding Orb, and the armour and weapons of each of the three heroes.

A Complex Manipulation requiring 2 successes is necessary to open a treasure chest.  The attempt may only be made, however, if the Overlord currently has at least one of the Emir's Turanian Infantry on the playing surface, or if he has revealed the Emir.


Terrain

If the game is played on 3D terrain, the House Rules for this apply.


No character may leave the board unless he has the Giant Bear with him.
All doors are considered unlocked, but moving through them requires an additional movement point.
The Giant Bear may not leave street level.


Other House Rules

If players are in agreement, any or all of the other House Rules may apply


SSRs

-  Crowded Streets

Three crowds are placed at the start of the scenario, in B3, E3 and D4.  At the start of the Overlord's turn, he can move each crowd into an adjacent hex, but only at street level.  Crowds may not enter buildings and there can never be more than one Crowd in a hex.

A Crowd counts as two enemy figures for hindrance.  Crowds do not, however, hinder the movement of Overlord figures.  Skills and spells that reduce hindrance apply to that generated by Crowds.

Any weapon or spell with a zone effect will instantly disperse a Crowd in that hex (remove the Crowd).


-  Ain't no bear hunt without the Mother of all Bears

The Giant Bear is placed in C3 at the beginning of the scenario.

At the end of each of his turns, the Overlord must move the Giant Bear its full 5 movement points; during this movement, the Giant Bear may not enter the same hex twice.  This movement is hindered by characters and by Crowds.  The Giant Bear may enter a building through a door, and pays no additional cost to do so, but it may not leave street level.  It may leave a hex occupied by a Hero or an Overlord Captain, but may not move into such a hex.


-  No Giant Bears were hurt during the making of this scenario

The beasts are not killed during these hunts, but must be wrestled.  They slowly tire out as the hunt continues.  Only a Hero, a Captain or the Emir may attack the bear, and must do so bare-handed.  They need as many successes, in one attack, as the current turn marker (8 on the first turn, and so on).

If an attack succeeds, the Overlord may no longer move the Giant Bear at the end of his turn.  Guiding the subdued bear out of the streets is akin, for a Hero, to carrying an item with 9 encumbrance.  Captains and the Emir guide the bear without additional difficulty, it being assumed that bystanders help. Treated the subdued Giant Bear like an "item" : it is dropped if the carrier receives a wound or is in any way forced to leave the hex (most notably, by the effects of a spell).


-  Push but don't shove

Unless concerned by the "Playing Dirty" SSR, Overlord characters can only use bare-handed attacks against Heros, and vice versa.  No Wounds inflicted on Heros from a bare-handed attack may have lasting consequences as per Campaign Rules for Wounds; it is suggested that the Energy Gems placed in the Wound Zone due to such attacks be replaced by red gems. 


-  Playing Dirty

Among the Captains is one of the five brothers, and some of the soldiers are his creatures. 

When the Overlord activates the Grey Captain tile, he may choose to reveal one of the three (his choice) as the Emir.  Take the Pallantides tile, which now represents the Emir, and place it at the end of the River (before moving the Grey Captain tile), and activate this time both Captains and Emir.  If no Grey Captains are now in play, because the last of them has proven to be the Emir, flip the Grey Captain tile onto its blooded side.  The Emir has 6 wounds, less any he took while disguised as a Captain.

The Overlord may make the same choice for Turanian Infantry.  Some or all of a given activated colour may be chosen to be the Emir's soldiers, and are marked as such by any appropriate means, but there may never be more than four at any time.  The soldier's passive defense is no longer 0.  If an Emir's soldier is killed, it becomes an ordinary soldier for reinforcement purposes. 


-  I can see you !

Since Brude was spying on the gathering, he can attempt to identify if a Captain is the Emir.  This is a complex manipulation.  It requires line of sight.

It also requires as many successes as Brude would have to spend movement points, if he were to theoretically move from his current position, by the quickest route, to the Captain's, and one hex beyond, doing so entirely on the same level as the Captain (which essentially means that a Captain on a roof will, logically, be far easier to identify).  Obviously any hindrances must be taken into account.  Two less successes are required if Brude has a height advantage.

If the detection attempt is successful, the Overlord must immediately decide if the Captain is the Emir or not.  If he is not, he cannot be chosen to be the Emir later in the scenario.  If he is the last Captain to be successfully identified, he must be the Emir (but the Emir is not revealed simply because only one Captain remains unidentified).  If the Emir is revealed in this way, place the Pallantides tile, which now represents him, at the end of the River.  The Emir has 6 wounds, less any he took while disguised as a Captain.

The "Push but don't shove" SSR ceases to apply to the Emir and to the Emir's soldiers; and an Overlord figure which is neither may not use "Sacrifice" to shield them; note however that the Emir must still use only unarmed attacks against the Giant Bear.


-  Applause !

A Hero who wrestles down the Giant Bear gains +1 XP.  An additional +1 XP is acquired if the same Hero leads it off-table.

dimanche 4 juillet 2021

Chapter V : Cornered ! - The Adventure

The scenario is here.


Hunted through the dense forest by a Werewolf and his pack, Rudraige stood desperately alone.  He is however a mighty Brythunian lord, and not without defense.


The warrior decided to stay out of the trees, and despite nature playing tricks on him, slew four giant wolves in quick succession.  Leaving a little blood behind to throw off the scent, he followed the stream northwards, in the hope of finding a way out.  Rudraige came across a hapless victim from another hunt, taking a javelin from the corpse.  More wolves came hurtling through the undergrowth; he impaled one on his sword, then threw his shield in the muzzle of a second.  This desperate action bought him enough leeway to at last find his bearings.  From a small rise in the ground, and with the help of a sudden ray of sunlight, he could see freedom somewhere to the west.

This had cost precious time, however.  Bounding between the thick tree trunks came a Dire Wolf.


Rudraige warded off its assault, not without hurt.  Knowing the Dire Wolf would avoid his lesser companions from being distracted [the Dire Wolf can fairly easily remove blood from the map, ndlr], Rudraige put all his strength into an all-out assault : and brought the beast down, head cloven from shoulders !

By now the Werewolf, an enemy of great power, had entered the fray.  Tired and weakened, Rudraige fought a running battle against it.

It bayed for reinforcements however, which though easily overcome, slowed the Brythunian down.  The lord was now bleeding profusely [with only two energy gems left, ndlr], but stumbled onto the way out, which was now only a stone's throw away.  His armour was shredded and of little use against the Werewolf in any case [Precision Strike proved to be a useful skill during this game, ndlr], so he threw it off in a desperate attempt to reach freedom.

The Werewolf was faster however, and dragged the Brythunian down.  He wounded it in a desperate last struggle, but then all strength left him.  The last thing he saw were blood-specked jaws biting down, and then darkness.  Eternal darkness.

Rudraige dies a hero's death.  Splitting off from his comrades helped buy them precious time, then saved a little girl's life.  Such an accomplished hunter of beast and man must have known that, alone, he had little chance against the horrors of the wilderness.  Despite the odds, he was close to making it [the exit hex was only a turn away, ndlr].

That the Gods appreciated his deeds is shown by the blow of a hunting horn, that of Eadric. The Werewolf knows to fear that sound, and his pack disperses, leaving the Brythunian's corpse unsullied.

A few days later, homing in on the scroll, a Hyperborean Emissary recovers it among the debris of battle.  The amount of blood makes it obvious that her quarry is dead.  She decides there is little interest in pursuing the tracks north, grabs up the scroll and pushes her harried company east.  Between them and Turan there are several hundred leagues....


A well-balanced scenario - Rudraige's error was no doubt putting so much wrath into slaying the Dire Wolf, then lacking the Energy to leave a blood trail - and an epic end to a mighty warrior.  This is the stuff legends are made of !