dimanche 8 juin 2025

Chapter VI : Au Nom d'Ibis

Number of heroes : 3
Difficulty : 2

Au Nom d'Ibis


Based on the scenario "Au Nom d'Ibis"

Frédéric Henry 


Helped by Constantius' treachery and Gawayn's passivity, the Hyperborean Emissary has seized control over Ardon.   She has ushered in a reign of terror, or brutal murder and a fear of the dark.

A message sent to her superiors in the bleak north, brings the reply that no help can come for the moment.  The Emissary smiles evilly at this : it means she has her hands free in Ardon, and when it is utterly hers, she will proclaim herself Witchman, and none amongst her gaunt comrades will dare challenge her claim.

One dark night, she slips from the keep, in company of one of the demons that constantly whispers in her ear.  She heads for the cemetery, where she will raise the army she needs to submit this place utterly...

Fortunately, Chimène still has some eyes and ears in the Great Hall, a few willing to die to save the glory of Ardon.  The dog Constantius has hunted down most of them, but not all.  It is lucky he fears his new mistress more than he desires her attention...

The warrior nun is in no condition to slay the woman who unjustly occupies her throne.  That task will fall to her faithful companions : Zoraya and Brude.  A third man volunteers for this most perilous of missions - Gawayn.  Although her companions urge against it, Chimène, an ardent follower of Mitra, believes that salvation comes from the quest for pardon.

When they arrive, it is almost too late : inhabitants and warriors of old alike have begun to stir in their graves... 


Objectives

-  The Heroes win if they kill the Hyperborean Emissary before the end of turn 8.

-  The Overlord triumphs otherwise.

In my campaign game, a victory for the Overlord in this scenario means the fall of the Pillar of the North, which will have wide-reaching implications for the world of Hyboria


Game length
The scenario lasts 8 turns.  The Heroes play first.

Scenario Map.

The playing surface is 7 x 7 hexes, gridded A to G (columns) and 1 to 7 (rows).  It portrays the cemetery of Ardon, with its graves and barrow mounds.


Heroes
In the campaign setting, the following heroes take part in the adventure, with any equipment they had or have acquired, and spells selected using the campaign game method.


Brude (set up in C7). 

Zoraya (set up in C7).

Gawayn (set up in C7). 


All heroes begin with 5 Energy Gems in the Fatigue Zone.  

If any heroes are bearing wounds from previous adventures, the effects of this is now taken into account.  

Gawayn has healed any wounds he might have; the other heroes may make a Recovery attempt.


The Overlord
The Overlord's forces are as follows :

Hyperborean Emissary (set up in G2), with Pestilential Swarm and Teleportation.

A Wight  (set up in B1); use the Black Demon or the Swamp Demon tile, as you choose.


Green Mummies (use the tile with Armour of 2 and Jinx), representing the archaic dead of Ardon

Blue Skeletons (use the Mummy tile with Armour of 3), representing accomplished warriors 

Red Skeletons (use the tile with Armour of 0), representing inhabitants

Orange Skeletons (use the tile with Armour of 1), representing young warriors 


The Overlord begins with 9 Energy Gems in the Available Energy Zone, and 3 in the Fatigue Zone.  He or she recovers 5 each turn.


Ravens
When an Event is played, the Overlord can choose from the following events : 


Reinforcements : 20 Reinforcement Points the first time, 10 Reinforcement Points thereafter

These can be used to raise any Mummies or Skeletons, anywhere on the playing surface, but no more than two per hex.  There can be no more than five figures per tile. 

The Mummy and Skeleton tiles begin the scenario in the River; despite no figures being attached to them, they are not flipped over and thus cannot be dredged. 


The River


1 : Hyperborean Emissary (5 wounds)
2 : Wight (10 wounds)
3 : Blue Skeletons
4 : Red Skeletons
5 : Event 1
6 : Wight (10 wounds)
7 : Orange Skeletons
8 : Green Mummies


Reinforcement Zones
There are no reinforcement zones (.., .., ..).


Equipment Cards
There are eight Treasure Chests (A1, B1, D1, E1, G1, G3, G4, G6), each needing a Complex Manipulation with 2 successes to open.  The Equipment Deck is made up of 2 Life Potions, 2 Javelins, 1 Scale Mail, 1 Crossbow, 1 Ecu and 1 Epee.

There are also three Holy Relics scattered over the playing surface (A6, E3, E5).  One of them is an Explosive Orb, use any appropriate cards with a Hindrance of 1 for the two others.


Terrain

If the game is played on 3D terrain, the House Rules for this apply.

All doors are unlocked.

Doors, Interior walls and Exterior Walls are vulnerable to the Wall Breaker skill.

Heros may not leave the board by any board edge zone.


Other House Rules

If players are in agreement, any or all of the other House Rules may apply


SSRs

-  Holy Relics

The Holy Relics must be located, or prised from their supports, or dug-up...in all cases, they are initially placed face down.  They are only placed face-up when a Hero in the same hex, succeeds a Complex Manipulation requiring 3 successes.

A Hero carrying one of the first two Holy Relic counts as three figures, for purposes of blocking Hindrance caused by Overlord figures in the same hex.  A Hero carrying the Explosive Orb Holy Relic (the Holy Hand Grenade !) does not benefit from this special rule.

Chapter V : Death from the North - The Adventure


The scenario is here.

As Constantius scuttled into hiding, the Hyperborean Emissary cast one withering glance around the Hall, and set her Dynwocor upon her enemies.  The two of them concentrated on the Brythunian crossbowmen, who would make more useful "allies" than the town militia.

Zoraya was the first to lay hands on her weapon, upon which she leapt over the balcony, and landed running to protect Chimène, who was busy ordering her men to flee to safety, and therefore vulnerable.  Brude sent his guardsmen to seal off the different stairwells and buy precious time from behind their shieldwalls.

This was indeed enough to make the Emissary hesitate, and concentrate her efforts on the Brythunian guardsmen, who were invulnerable to any undead and would have to be eliminated by magic.  In the meantime, the Dynwocor was tracking down isolated enemies, and the first wave of skeletons were seeking out the militia.

Brude had at last managed to snatch up his sword, and after kicking a couple of skeletons down the stairwell to shatter on the floor below, he decided to join Zoraya in hunting down the Dynwocor.  The creature was exposed, but was no easy target, due to the terror he inspired and his thick hide.  Brude was however undeterred, and slipped his heavy blade through the abomination's ribcage, bringing it crashing down.


Zoraya flared with rage as she spied the cowering Constantius, but there was no time.  She set off in pursuit of the Emissary, and it was obvious that the Hyperborean would fail.

The Emissary, however, dispatched the final Brythunian guard defending the stairwell with her Pestilential Swarm, ran up the stairs to where a militiaman was cowering, took him out with a vicious sword blow, ran back out onto the landing, and slew a crossbowmen with her Withering spell.  Chimène , armed at last, had smashed several skeletons into shards of bone, but had been unable to save everybody.

There was now only a single militiaman left, hiding in a room.  The heroes were on the brink of exhaustion.  Brude moved into position in the corridor, to slow down any attacks; he ordered Chimène further away, fearing for her unborn child should the Hyperborean abandon victory but seek bloody revenge. 

Time was indeed running out for the Emissary.  She was too far away to use her destructive magicks...but necromancy knew no such bounds.  She raised three skeletons, and spent all her remaining energy to guide them past Brude and onto the surviving militiaman.  The first strike went awry, the second would have hit home except for Chimène's last second warning.  Everything rode literally on the last stroke and the Emissary's ability to direct the skeletal wrath [one reroll left !]...and it hit home. 


The Emissary had triumphed !  With their men dead, and soon to be submerged under waves of undead, Chimène, Brude and Zoraya were forced to yield the Hall, and then the Keep itself, to the Emissary.

Within days, Ardon was in the hands of Hyperborea, and the Pillar of the North fissured.  Such a reign of terror had begun that even Constantius quickly ceased strutting about the keep, and kept instead to the shadows, hoping his new mistress would forget all about him....


Update heroes with wounds and experience

Victory for the Overlord, on what would have been the penultimate die roll of the scenario.  Nail-biting stuff !  This is a tough scenario for the Overlord, who must not give in to the temptation to raise the dead too fast and "drown" the River with them.  The Dynwocor [Bone Golem] is powerful, but can only bring down one enemy at a time...should it be used on the Heroes, or concentrate on the guardsmen who are tough to kill ?  As for the Heroes, they must trade off speed and safety to arm up, and avoid collecting in one place, an easy target for the Emissary's magicks...


Only Brude gains XP, +1 XP for having slain the Dynwocor.

Chimène did not receive any additional wounds, but is still severely hurt with the five she had previously.  She had a tough choice to make, and could have remained next to Brude in the corridor to hinder oncoming enemies, but risk being targetted and wounded.  Brude has no additional wounds, and Zoraya had only received a scratch from a skeletal blade.

lundi 12 mai 2025

Chapter V : Death from the North

Number of heroes : 3
Difficulty : 3

Death from the North


Based on the scenario "Death from the North"

Unknown Author 


Chimène finally emerges victorious from the power struggle at Ardon, the chronicles of the Aifreweia recording her single-handed courage in standing up to the tyrant, and her tireless efforts to save both the physical treasure of Ardon, and the treasure that is its children, from his hands.  The warrior-nun was acclaimed in the hall by the assembled nobles, and Gawayn cast into ignominy.

The Pillar of the North is, however, greatly weakened.  Chimène herself to begin with, troubled by wounds that refuse to heal [she has 5 wounds under the Campaign System, which is particularly difficult to recover from].  She faces a difficult and exhausting pregnancy, but must carry the child to term if Ardon is not to plunge back into chaos.

One of the women that has become her closest friend and advisor, Ygritte, is not only impopular in Ardon - she slew a child during the attempt to rescue Zoraya from Gawayn's clutches - but an embassy from the Aifreweia is also seeking retribution for the death of their abbot, Rashar, at her hands.  Pressure for a trial is growing.

If Chimène can count on both noble and popular support for the moment, neither see her other friend, Zoraya of Turan, with a good eye, despite the diplomat being the key to an unexpected alliance with the Sultan himself against the Hyperborean threat.

There is also Gawayn himself, of course, although for the present time he seems to be merely brooding over his defeat.  Despite the urgings of her council, Chimène refuses to punish him, as he was only acting out of concern for Ardon, even if his poor choice of allies was his undoing.  Speaking of his allies, Chimène has been unable to remove Constantius from the court; for now, she has managed to keep distance from his brutish methods, but it is making her look weak.

She does not, however, stand alone.  If both Zoraya and Ygritte are both somewhat difficult friends to have, the Lady of Ardon can also count on Kerim of the Watch, even if he is rarely within the walls, and Eadric.  As well, of course, as another Nemedian : faithful Brude whom she has named her Captain of the Guard.


The Hyperboreans are closely apprised of this troubled situation.  It is why they have sent one of their dread Emissaries, in secret, to the Brythunian stronghold.

Although Gawayn is not totally insensitive to her whisperings, the perverted Northwoman finds a readier ally in Constantius.  The mercenary manages to smuggle her, and a cloaked and hooded accomplice, into the hall of Ardon, where the fragile Chimène and her unborn child will be within her reach.  Not even the brutal Constantius expects the calamity to come, when the Emissary's companion shrugs off its shapeshifter charm....

In my campaign, the previous events have had an important effect on this scenario, as Chimène, one of the heroes, must not only play heavily wounded, but must avoid any further harm if she hopes one day to recover.


Objectives

-  The Heroes win if they kill the Hyperborean Emissary, or prevent the Overlord from killing all of the Militia, the Brythunian Spearmen and the Brythunian Crossbowmen before the end of turn 9.

-  The Overlord triumphs otherwise.

Game length
The scenario lasts 9 turns.  The Overlord plays first.

Scenario Map
As the action takes place indoors, it is recommended using the Tavern map and following the set-up of the official scenario.


Heroes
In the campaign setting, the following heroes take part in the adventure, with any equipment they had or have acquired, and spells selected using the campaign game method.


Chimène (set up in ..).  As additional equipment, she has a set of Scale Mail that a guard hastily hands her when the enemy appears.  Her Turanian Sword is laid out in one of the rooms (see later).

As allies, Chimène controls 5 Militia (use the Grey Pirate tile), and 5 Brythunian Crossbowmen (use the Purple Bossonian Archers tile).  Only Chimène can command them.

Brude (set up in..).  His Hyrkanian Sword is laid out in one of the rooms (see later).

As allies, Brude controls 5 Brythunian Spearmen (use the Red Bossonian Guards tile).  Only Brude can command them.

Zoraya (set up in..).  As additional equipment, she has a Tribal Shield, a relic of an ancient raid that she snatches off the wall.  She does not have her Ornamental Spear with her. Her Sword is laid out in one of the rooms (see later). 


All heroes begin with 6 Energy Gems in the Fatigue Zone.  

If any heroes are bearing wounds from previous adventures, the effects of this is now taken into account.  

Several weeks have gone by since An Ape, a Few Kegs and a Hostage, so Recovery is possible [this has already been rolled for the scenario, with no success].


The Overlord
The Overlord's forces are as follows :

Hyperborean Emissary (set up in ...), with Pestilential Swarm and Withering.

A Dynwocor  (set up in ..)


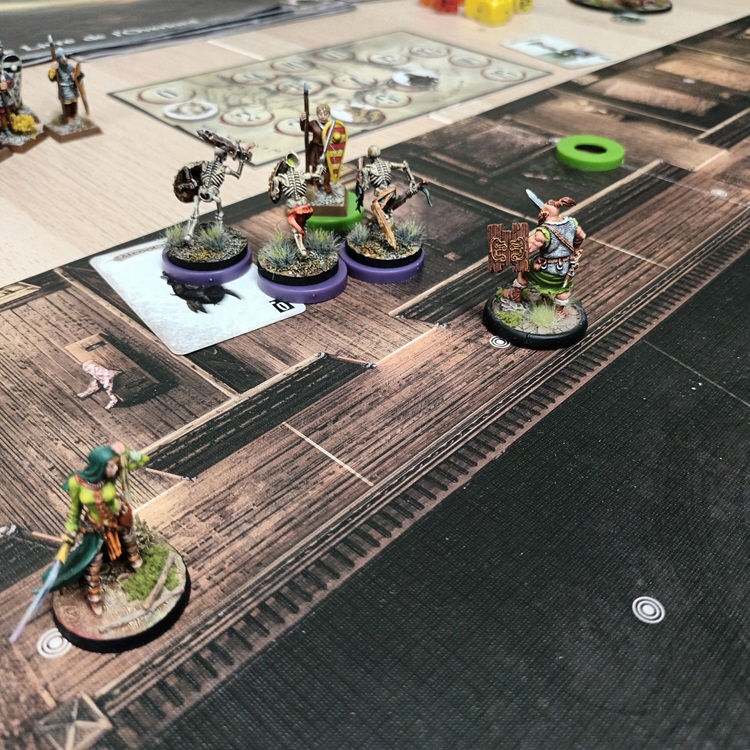
Grey Skeletons (use the tile with Armour of 1)

Purple Skeletons (use the tile with Armour of 1)

Red Skeletons (use the tile with Armour of 0)


The Overlord begins with 6 Energy Gems in the Available Energy Zone, and 0 in the Fatigue Zone.  He or she recovers 3 each turn.


Ravens
When an Event is played, the Overlord resolves each of the following events in order  : 


Gaining Ground : see SSR

Reinforcements : 5 Reinforcement Points


The River


1 : Hperborean Emissary (6 wounds)
2 : Dynwocor (8 wounds)
3 : Event 1
4 : Empty
5 : Empty
6 : Empty
7 : Empty
8 : Empty


Reinforcement Zones
There are no reinforcement zones (.., .., ..).


Equipment Cards
There are no Treasure Chests (.., ...), each needing a Complex Manipulation with 2 successes to open.  The Equipment Deck is empty.

There are however a Hyrkanian Sword (belonging to Brude), a Pictish Drink, a Sword (belonging to Zoraya), a Life Potion, a Turanian Sword (belonging to Chimène), a Pictish Drink placed in the battle zone as per the set-up map (in clockwise order).


Terrain

If the game is played on 3D terrain, the House Rules for this apply.

All doors are unlocked.

Doors and Interior walls are vulnerable to the Wall Breaker skill.  Exterior walls are not.

Heros may not leave the board by any board edge zone.


Other House Rules

If players are in agreement, any or all of the other House Rules may apply


SSRs

-  Dawn of the Dead

Whenever a Militia, a Brythunian Spearman or a Brythunian Crossbowman is killed, the Overlord replaces its model in that area with a laid down skeleton model (or a marker), that retains the same base colour (Grey, Purple or Red).  They do not Hinder.


-  Skeletons

The three skeleton tiles are not placed in the river at the beginning of the scenario, but set aside for later use (see SSR "Gaining Ground").

When a skeleton is killed, it is not removed from the board, but instead laid down (or replaced with a marker), retaining its colour.  They do not Hinder. 

If a skeleton tile is dredged from the River, it is permanently removed from the game and cannot be recalled through the SSR "Gaining Ground".


-  Amulet

When the Dynwocor is killed, the Overlord places an Amulet (use the Stygian Artefact card) in the area it fell in.


The Amulet pulses with magical energy.  If an Overlord figure is in the same area as the Hero carrying the amulet, he or she can only pass the Amulet to another hero through a Complex Manipulation requiring 2 successes.


-  Hyperborean Emissary

The Hyperborean Emissary can only be wounded by a hero who is carrying the Amulet.  


-  Allies

Each hero can only activate the Allies assigned to it.  Allies can only move, they cannot attack.  A Hero cannot use Energy Gems to defend an Ally.


-  Gaining Ground

Before the scenario begins, the Overlord builds an Additional Gem Reserve of 6 energy gems.

When the Overlord activates the Event 1, and resolves the Gaining Ground event, the following things occur in order :

i)  The Overlord adds 2 gems from his Additional Gem Reserve, if any remain, to his Fatigue Zone. 

ii) The Recovery Value of the Overlord is increased, from 3 to 5, or from 5 to 7.

iii)  The Overlord now chooses one of the Skeleton tiles available to him, if any, and adds it to the end of the River, as long as there is at least one laying down Skeleton figure or marker of that colour.


-  Reinforcement

The Overlord can only Reinforce units whose tiles are in the River.  When the Overlord uses a reinforcement point, he or she stands up one of the laid down skeleton models / markers on the board.

A laid down skeleton model / marker cannot benefit from reinforcement, if the area is also occupied by a Hero.


-  Pictish Drink


A hero may discard this item to move 2 gems from their Fatigue Zone to their Reserve Zone, but must also suffer 1 wound.


-  Constantius

The vile Constantius is added to the battle zone, in the room in the bottom left corner.  He uses the Constantius tile and has 4 wounds.  He is totally passive during the scenario, cannot be activated and cannot be defended by a player.  His eventual demise serves only the campaign narrative.

Chapter IV : An Ape, Several Kegs and a Hostage - The Adventure


The scenario is here.

After overwhelming the first line of defenders in the courtyard, the company split into two, the kegs exploding overhead cautioning against grouping together.  Chimène and Ygritte split right, Zoraya and Brude left.

The Turanian cleared a path with her ornamental spear, thrown, and her sword, sweeping.  Brude followed behind, intending to push his way to the cell in which Gitara was being held and free her.

Chimène has picked up a keg, which proved to be a bad idea.  Ygritte's carefully aimed arrow buried itself into the creature but without hitting anything vital, and the Ape managed to lob a keg at Chimène.  She lost the one she was carrying in the resulting, blinding, explosion.  A drunken henchman then threw himself on that one with a lit torch he had nabbed from a fire-breather, and up it went.  When the dust settled, Chimène was sitting in the corner of the keep tower, quite hurt. 

To make matters worse, the Grey Ape, foaming at the mouth, shouldered Ygritte aside on the battlements, and charged Chimène.  Its powerful blows were almost impossible to defend, and left Chimène reeling [only 3 Energy Gems left].

Still, shouts were going up from the other side of the courtyard, as Brude had by now overtaken Zoraya, and was within view of the block of cells.  Constantius was hesitating between engaging him and protecting the door, when a waft of pitch fumes muddied his view.  Before he knew it, the Nemedian thief had picked the lock and slipped into the cell to awaken Gitara.

This turn of events gave Ygritte and Chimène the opportunity to distance themselves from the terrifying ape.


If the heroes were running out of time, the Overlord was running out of men.  Those who were available piled into the cell, but Brude was able to turn most of their knives away from the young noblewoman, and she defended herself well against those that made it through his guard.

Chimène erupted into the cell, pushing the henchmen away and allowing Gitara to escape through the door.  Sprinting down the corridor, Ygritte picked her up.  Zoraya was close to the lowered portcullis with a keg of pitch under her arm, waiting for her comrades to arrive before disposing of the guards.

Brude killed the two henchmen in the cell, and slipped away, leaving Chimène face to face with Constantius.  He made it to the portcullis, where Zoraya rolled the keg she was carrying to him.  Deftly, the Nemedian set it up and blew a satisfyingly large hole in the keep's defenses.  Along came Ygritte, marshalling Gitara to safety.

Back in the cell, Chimène lunged at Constantius, determined to end the brute.  He deftly evaded her attacks, however, and lunged back, almost killing her [1 Energy Gem left !].  The warrior nun came to her senses and fled the scene.


Victory for Chimène and her supporters, with the young hostage saved and spirited away.  A nail-biting finish, though, with Brude needing those 3 successes to light the keg and destroy the portcullis, with only two red dice to achieve them.  It could have gone either way.

A really enjoyable scenario.  The kegs are dangerous, but it is a great idea that the Overlord cannot move them himself, meaning that the Ape can only throw them from fixed points. The fact that only one group of reinforcements can be brought on at a portcullis before it closes also makes the scenario very tense.

The number of energy gems available to the Overlord means that he can both activate and defend his minions; on the other hand he does have a lot of ground to cover.


All four heroes gain +1 XP for their victory.

Chimène is severely hurt, with 5 wounds.  Brude has an additional wound.  Zoraya shrugged off a gash she received, whilst Ygritte was not only unhurt, but also had time before this rescue mission, to recover from her previous injuries.

samedi 3 mai 2025

Chapter IV : An Ape, Several Kegs, and a Hostage

Number of heroes : 4
Difficulty : 2

An Ape, Several Kegs, and a Hostage


Based on the scenario "An Ape, Several Kegs and a Hostage"

Unknown Author 


After the betrayal by Shaan'Hya that almost cost Ardon its entire treasury, Gawayn has become increasingly paranoid and isolated. He has already lost the backing of Eadric, who has turned towards Chimène.  Kerim, although honour bound not to rebel against the acclaimed Lord of Ardon, offers only lukewarm support and finds any excuse he can to distance himself from the hall.

Gawayn now only seems to trust a rather vile mercenary named Constantius, a Kothian who is as mad as his Emperor Strabon.  He encourages Gawayn's worst traits, and the Hall of Ardon has become a place of debauchery.

To attempt to ensure the vacillating loyalty of the nobles, Gawayn has given Constantius free reign.  The brigand decided to prevent what he perceived as a dangerous wedding alliance between two of the noble houses, by abducting the bride.

The stricken father of the bride to be has called on Chimène to save her.  The warrior nun gathers her companions - Ygritte, Brude and Zoraya whose wounds have more or less healed, and prepares to champion her cause.


The four heroes find the keep of Ardon in uproar. Constantius is amusing his drunken henchmen with a travelling circus of fire-breathers and the antics of their trained Grey Ape. His comrades in arms have overrun the keep; a few of the guards are also still loyal to Gawayn.  Fortunately, for the moment, the kidnapped girl is unharmed, languishing in one of the cells and no doubt trembling at her uncertain fate.


Objectives

-  The Heroes win if the future bride, Gitara, is able to flee the keep by the end of turn 6.

-  The Overlord triumphs otherwise.

Game length
The scenario lasts 6 turns.  The Heroes play first.

Scenario Map
As the action takes place indoors, it is recommended using the Castle map and following the set-up of the official scenario.


Heroes
In the campaign setting, the following heroes take part in the adventure, with any equipment they had or have acquired, and spells selected using the campaign game method.


Chimène (set up in ..)

Ygritte (set up in..)

Brude (set up in..)

Zoraya (set up in..)


All heroes begin with 5 Energy Gems in the Fatigue Zone.  If any heroes are bearing wounds from previous adventures, the effects of this is now taken into account.  Several weeks have gone by since The Treasure of Ardon, so Recovery is possible.


The Overlord
The Overlord's forces are as follows :

5 Green Henchmen [use the Pirate tile] (set up in .., .., ..)

5 Orange Henchmen [use the Pirate tile] (set up in .., .., ..)

4 Blue Brythunian Infantry [use the Bossonian Guards tile] (set up in ...)

Grey Ape (set up in ...)

Constantius (set up in ..)


The Overlord begins with 9 Energy Gems in the Available Energy Zone, and 3 in the Fatigue Zone.  He or she recovers 7 each turn.


Ravens
When an Event is played, the Overlord can choose one of the following : 


Reinforcements : 2 Reinforcement Points


The River


1 : Green Henchmen
2 : Grey Ape (6 wounds)
3 : Blue Brythunian Infantry
4 : Orange Henchmen
5 : Grey Ape
6 : Constantius (4 wounds)
7 : Event 1
8 : Empty


Reinforcement Zones
There are one reinforcement zones (.., .., ..).


Equipment Cards
There are three Treasure Chests (.., ...), each needing a Complex Manipulation with 2 successes to open.  The Equipment Deck is made up of 1 Life Potion, 1 Leather Armour, and 1 Mitra's Mace.


Terrain

If the game is played on 3D terrain, the House Rules for this apply.

All doors are unlocked.

Doors are vulnerable to the Wall Breaker skill.  Interior and Exterior walls are not.

Heros may not leave the board by any board edge zone.


Other House Rules

If players are in agreement, any or all of the other House Rules may apply


SSRs

-  Keg of Pitch

The kegs of pitch used by the fire-breathers are placed around the keep, six in all (..., ...).

If the Grey Ape is in the same area as a keg of pitch, he can pick it up and throw it as his attack.   The usual rules for throwing objects are used, the Grey Ape using his Melee attack value.  The keg of pitch explodes in the zone it lands in.

The Overlord may also explode the pitch kegs by expending the melee attack of an activated model in the same zone.

All figures in a zone affected by an exploding keg, take a two red dice area attack.  The usual defenses against area attacks may be used.  The keg of pitch is removed from play.

A Hero may pick up a keg of pitch and transport it, it counts as 6 encumbrace.  If such a hero is wounded, the keg of pitch is immediately dropped, but does not explode...unless an Overlord figure then throws himself on it, of course !


-  Gitara's Cell

The door to the cell is both locked and reinforced.  It requires a Complex Manipulation with 3 successes to open, and is immune to the Wall Breaker skill.


-  Gitara

As long as Gitara's cell door is unopened, she cannot be harmed.

As soon as the door is opened, the heroes take the Gitara tile, as an Ally.  Any hero can activate Gitara by spending an energy gem, and may give her additional movement points within the usual limit, but she may only be activated once per turn. 

A Hero in the same area as Gitara gains the Bodyguard skill.  Only such heroes can spend energy gems to defend Gitara.


-  Reinforcements

The Overlord can also bring on reinforcements in either of the portcullis zones (marked with 1 and 2).  Only one portcullis can be used per Event.

If reinforcements come through a portcullis, they close it behind them.  Remove the corresponding token and replace it with a portcullis token.  When a portcullis is lowered, no further reinforcements can come through it.  As long as it is lowered and not destroyed, no Hero can leave the keep by it.


-  Destroying a Portcullis

A Hero in an area with a lowered portcullis, and carrying a keg of pitch, can perform a Complex Manipulation requiring 3 successes to correctly place and ignite the keg, and destroy the gate.  The explosion causes no harm to any figures in the area.  The heroes can now flee the keep through the destroyed portcullis.


-  Fleeing the Keep

A Hero or Ally can flee the keep from any of the outer areas of the west edge of the map, by spending one movement point.

A Hero or Ally can also flee via the areas marked 1 and 2 on the map, as long as it does not contain a portcullis that is not destroyed. 

Once a model has fled, it cannot return to the combat zone.  The Overlord's units cannot leave the keep in any way.

Chapter III : The Treasure of Ardon - The Adventure

Situation at scenario end...


The scenario is here.

Whilst Brude defended the main treasure room and the corridor leading to it, Ygritte wreaked havoc on the henchmen milling around in front of her.

Chimène easily fought her way out of the pit, and although she was momentarily bogged down by the sheer numbers of enemies, Ygritte had reached the parapet and was sending a rain of arrows down into the crowd.

The small treasure trove on the south-west tower was quickly spirited away, but Shaan'Hya was unable to organise the human chain to take away the treasure she had already piled up in the guardroom, Chimène disrupting every attempt.  In the end, her henchmen were forced to take it away piece by piece, and the heroes did not hesitate to snatch some of it up.

Shaan'Hya managed to get six overflowing coffers of treasure out of the keep, but it had taken precious time, and her loyal followers had been decimated.  She was left largely unprotected as an enraged Chimène carved a path towards her, Ygritte at her back.  In two swift blows it was all over for the traitor.

The fight went out of the remaining enemies, a last half-hearted attempt to grab the treasure from the strongroom being dispersed as Brude counter-charged down the hallway.


Victory for Chimène, Shaan'Hya removing only six coffers, and dying in the attempt !

This was a tough one for the Overlord.  The treasure outside of the strongroom will almost inevitably be spirited away, but the heroes can of course pick some of it up, effectively protecting it, and it takes a lot of time.  Forming those human chains is a real mind-bender !

The strongroom was relatively easy to protect; perhaps Shaan'Hya should actually have concentrated on that first, and kept calling on masses of reinforcements to overwhelm the defenders. She can reflect on her mistakes in the afterlife !

Chimène, having slain Shaan'Hya, gains +2 XP, whilst Brude and Ygritte gain +1 XP for their victory.  She placed the "Conan Sword" back where she found it, preferring the versatility of her Turanian blade.

The warrior nun was unwounded, but both Ygritte and Brude took a wound from the fierce fighting...

mercredi 23 avril 2025

Chapter III : The Treasure of Ardon

Number of heroes : 3
Difficulty : 3

The Treasure of Ardon


Based on the scenario "Le Trésor de Tranicos"

par José Chaves, Jérôme Saffetti, Itai Perez et Julian Lemonnier 


Rattled by the betrayal that almost cost him his life, Gawayn has begun to favour allies from outside of his eorldom.  Despite her having tried to kill him, he named Shaan'Hya, the Zamoran, as his Treasurer.


As the saying goes, trusting a Zamoran with your gold, make a warm bed for the wolf in the sheep pen.  This ancestal wisdom did not take long to prove.

One day, when Gawayn had ridden north with most of his warriors to investigate rumours of a Hyperborean attack, Shaan'Hya rid herself of the remaining loyal guards, and then opened the gates to a bunch of henchmen and mercenaries.  They were to steal as much of Ardon's treasure as possible and load it into waiting carts; all would then flee to asylum in Zamora, where their ill-gotten gains would fulfil even their darkest desires.


That, at least, was the plan, but a loyalist guard who had managed to escape, knowing his lord too far off to intervene, brought word to Chimène.  Without hesitating an instant, she and her allies, Ygritte and Brude, ran up to the keep to thwart the plot.

Whilst Ygritte and Brude made for the chambers where the majority of the treasure was kept, Chimène saw a chance to stake a renewed claim for Ardon.  She remained in the courtyard, where she brazenly called Shaan'Hya to reckoning. 

It went precisely according to plan...despite appearances.  Chimène was thrown into the pit, and the keep's wolves were let off their leash to devour her alive, whilst the inhabitants of the castle looked on.

 Precisely according to plan...if the warrior-nun is able to survive.  They would also have to preserve the treasure, for an eorldom without any resources would be nothing more than another helpless victim in the path of Hyperborea's rage.


Objectives

-  The Heroes win if they prevent the Overlord from getting at least 9 units of treasure out of the keep by the end of turn 8, at which point loyalists from Ardon will put a stop to their attempts.

-  The Overlord triumphs immediately if he gets at least 9 units of treasure out of the keep.  It will be enough to ensure lifelong comfort in Zamora, any more would be just a bonus.

Game length
The scenario lasts 8 turns.  The Heroes play first.

Scenario Map
As the action takes place indoors, it is recommended using the Castle map and following the set-up of the official scenario.


Heroes
In the campaign setting, the following heroes take part in the adventure, with any equipment they had or have acquired, and spells selected using the campaign game method.


Chimène (set up in ..)

Ygritte (set up in..)

Brude (set up in..)


Chimène begins with 5 Energy Gems in the Fatigue Zone, the others with 4.  If any heroes are bearing wounds from previous adventures, the effects of this is now taken into account.


The Overlord
The Overlord's forces are as follows :

5 Red Henchmen [use the Pirate tile] (set up in .., .., ..)

5 Green Henchmen [use the Pirate tile] (set up in .., .., ..)

5 Orange Henchmen [use the Pirate tile] (set up in .., .., ..)

5 Blue Brythunian Infantry [use the Bossonian Guards tile] (set up in ...)

5 Grey Wolf-Dogs [use the Hyena tile] (set up in ...)

Shaan'Hya [use the Kerim Shah tile] (set up in ..)


The Overlord begins with 9 Energy Gems in the Available Energy Zone, and 2 in the Fatigue Zone.  He or she recovers 5 each turn.


Ravens
When an Event is played, the Overlord can choose one of the following : 


Reinforcements : 6 Reinforcement Points

To Arms :  the Overlord can activate another tile, anywhere in the River, for 1 energy gem only.  It does not count as the 2nd activation of the turn.

Hand in hand : The Overlord can pass a treasure chest from one zone to another, as long as a chain of friendly figures exists.  Enemy presence is not a hindrance.  If the last zone in the chain is in a reinforcement zone,  a figure can leave the playing surface with the chest.  This can be done twice each time the event is activated.

Eadric arrives :  Although Eadric is still a fence-sitter in this conflict, he mistakenly assumes Chimène is the guilty party and takes Shaan'Hya's side.  The Overlord can add Eadric in a reinforcement zone.  Use the Zaporavo tile, which replaces one of the two Event tiles in the River.  Eadric has 6 PV.


The River

1 : Red Henchmen
2 : Green Henchmen
3 : Shaan'Hya (6 wounds)
4 : Event 1
5 : Orange Henchmen
6 : Blue Brythunian Infantry
7 : Grey Wolf-Dogs
8 : Event 2


Reinforcement Zones
There are five reinforcement zones (.., .., ..)


Equipment Cards
There are eight Treasure Chests (.., ...), each needing a Complex Manipulation with 2 successes to open.  The Equipment Deck is made up of 2 Life Potions, 1 Dagger, 1 Crossbow, 1 Explosive Orb, 1 Conan Sword, 1 Axe and 1 Halbard.


Terrain

If the game is played on 3D terrain, the House Rules for this apply.

All doors are unlocked.

Doors are vulnerable to the Wall Breaker skill.  Interior and Exterior walls are not.

Heros may not leave the board by any board edge zone.


Other House Rules

If players are in agreement, any or all of the other House Rules may apply


SSRs

-  The coffers

The coffers, whose value of 1 or 2 is hidden until they are carried off-board by the Overlord, are placed according to the scenario instructions.  

Picking up, carrying, or setting down a coffer is not an action, and does not interrupt an Overlord figure's base move.  An Overlord figure carrying a coffer cannot attack, and can only benefit from 1 additional movement point.  At the end of his or her move, the Overlord figure sets the coffer down, to get his breath back.

An Overlord figure in a reinforcement zone may leave the combat zone, as a move, at which point the value of the coffer is revealed and added to the Overlord total.

A Hero can pick up a coffer as a Simple Manipulation.  Their encumbrance value is 2.


-  The Horn of Valour

When the first Hero is put out of action, the Keep's Horn of Valour is sounded, no doubt by a loyal guard.  This alerts the loyal troops in town. The turn counter moves forward 1 space, meaning the Overlord must hurry.